My First Make : Adding a Side Seam Pocket

Posted by The Tall Mama
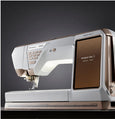
When I first turned on the Designer Jade 35 I was SO excited to try out all the amazing features, especially the embroidery!  But first and foremost I love to make clothes.  It is important to me that a machine works well as a sewing machine. 
 
The Designer Jade 35 sews beautifully!  One of my first projects with the machine was my favourite rose print pleated midi skirt (self drafted) which was in my repair pile.  I needed to make the waistband smaller and thought while I was at it I would add a decent side seam pocket.
 
When I made this skirt a few years ago, I just popped in a pocket which was a bit too small.  I think you should be able to fit your phone in your pocket!  So with that in mind I drafted a new pocket that fits my phone without risk of it falling out.
20180104_110811.jpg
This is the pocket I drafted, it measures 34cm X 19cm (with 1.5cm seam allowance included) and is the perfect size for my phone:​​

 
​​​


After making many garments with pockets, I have discovered that I prefer a pocket that is secured in the waist band.  The pocket is held forwards rather than flapping around inside your skirt (or pants).  You can see here how it looks from the inside:
 
insidemidi.jpg
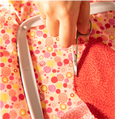
To add the pocket I simply removed the waistband, made the adjustment to my current waist size and opened the side seam.  I attached the pocket front to the front of the skirt and the pocket back to the back of the skirt.  I stitched from the top of the skirt to the mark on the pocket (5cm stitch line), then stitched together the base of the pocket opening from the bottom mark on the pocket and down the side seam.  Always make sure your hand can comfortably fit into the pocket opening (and your phone!).
 
When it came to sewing the pocket together and finishing the seams I was thrilled that the Designer Jade 35 does such a perfect overcast stitch.  You simply change the foot and select the overcast setting on the machine (the machine tells you which foot you need to use which is so cool!).  Not everyone has an overlocker (serger), but having a machine which does such a lovely flat overcast stitch is a life saver!
 
As I was doing a big overhaul to this skirt, I also took out the invisible zipper.  After I had taken it out I realized that I didn't have an invisible zipper foot, oops.  I was thrilled to discover that I could simply attach the included zipper foot and move my needle position all the way to the left.  It sewed my invisible zipper in perfectly!  Amazing!
 
I am now back in love with my favourite skirt!  For my first sewing experience with the Designer Jade 35 I am absolutely thrilled with how it sews and it's great built in features.  I can't forget to mention the perfect "fix" stitch it does at the start and end of your seam or the automatic thread cutter!  I have previously sewn on a vintage machine which had none of these features, so they are all just so amazing to me and make for an even more enjoyable sewing experience!

midi2.jpg
Filed Under: 35, designer, jade, mama, pockets, tall, the
Comments
Blog post currently doesn't have any comments.

Post A Comment

Your email is never published nor shared.

Required Fields Are Marked*

hv.blogs.allowedtags <a href="" title=""> <abbr title=""> <acronym title=""> <b> <blockquote cite=""> <cite> <code> <del datetime=""> <em> <i> <q cite=""> <strike> <strong>
You have not entered information into one or more required fields. Please check your form and send again.